Topic Subscriber
The Topic Subscriber allows you to subscribe to and monitor messages published to specific topics.
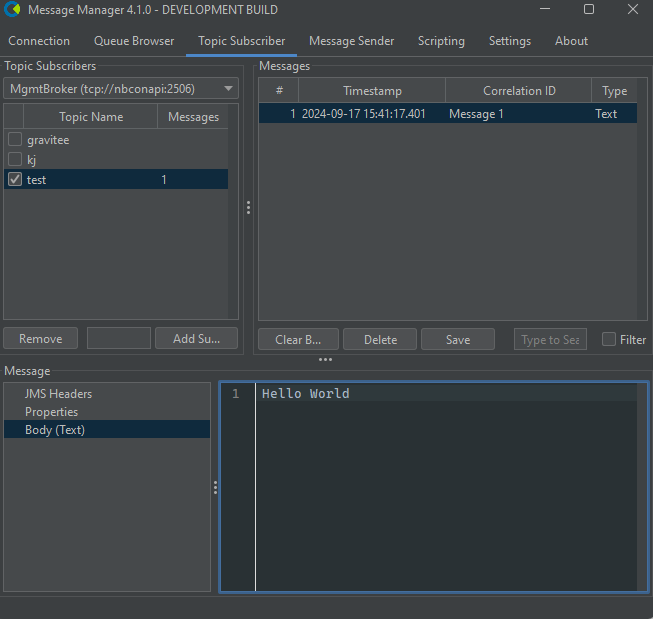
Broker Selection
Select the broker from the dropdown menu at the top of the Topic Subscriber panel. Depending on the messaging system this may be a single broker or a cluster of brokers.
Topic List and Filter
- The left panel displays a list of available topics/subscriptions for the selected broker.
- Click on the "Topic Name" column to get to the filter box above the queue list to quickly find specific queues.
Subscribing to a Topic & Consuming Messages
- Select a topic from the list and click the checkbox to subscribe to it.
- To unsubscribe from a topic, click the checkbox again.
- Messages are consumed in real-time and displayed in the Messages panel.
Manual Subscriber Creation/Removal
Not all brokers support listing of existing topics. You may need to manually create a subscription to consume messages.
To manually create a subscription, use the following steps:
- Select the broker from the dropdown menu.
- Enter the topic name or pattern in the "Topic Name/Pattern" field.
- Click the "Add Subscriber" button to start receiving messages.
- Messages are consumed in real-time and displayed in the Messages panel.
- To remove a subscription, select it and click the "Remove" button.
RabbitMQ Topic Format
RabbitMQ uses exchanges and routing keys instead of JMS-style topics:
- Enter topics in format:
exchange:pattern(e.g.,amq.topic:#) - Topics without colon default to
amq.topicexchange - Use
#to match zero or more words (e.g.,#matches all messages) - Use
*to match exactly one word (e.g.,orders.*.processed) - Examples:
amq.topic:#- all messages on amq.topic exchangeorders.eu.processed- defaults toamq.topic:orders.eu.processedcustom-events:notifications.*- explicit exchange with single-word wildcardlogs:#- all messages on logs exchange
Message View
- Select a topic/subscription to view its messages in the Messages panel.
- Use the Refresh button to update the message list.
- To save or export messages, select the desired messages and use the Save button.
Message Deletion (Local Buffer Only)
- Select one or more messages and click the Delete button to remove them from your local view.
- Important: This operation only removes messages from your local UI buffer.
- Messages are NOT deleted from the broker/topic.
- This only affects your current subscription view - other subscribers are not affected.
- New subscribers will still receive these messages.
For Kafka topics, the Delete button only clears your local message view. Kafka uses a log-based architecture where messages cannot be selectively deleted from topics. Messages remain in Kafka based on retention policies configured on the broker.
Drag and Drop
If supported by the broker, you can drag and drop messages between topics/subscriptions for easy message movement.
Search and Filter
Use the search field below the message list to find specific messages based on content, headers, or properties. Next to the search field is a filter checkbox that allows you to filter the message list matching the search term. It also allows you to inverse the search result by clicking the filter checkbox again.
Message Details
Select a message to view its details in the bottom panel:
- Metadata: If available, displays message metadata such as receipt count, timestamps,etc.
- Headers: Displays message headers such as JMSMessageID, JMSTimestamp, etc.
- Properties: Shows custom properties set on the message.
- Content: Displays the message body, with formatting options for different content types (e.g., XML, JSON, Text).