Overview
Message Manager is available as a standalone application for Windows, Linux and macOS.
Download
You can download the latest version of Message Manager from the official website.
There are two versions of Message Manager available: the open-source version and the commercial version. The open-source version is free to use and does not require a license. The commercial version, on the other hand, requires a license to use. The download links for both versions are identical.
The Free version comes with a 30-day trial period for the Commercial version.
Installation
Depending on your operating system, you can download the installer or one of the zip/tar.gz packages.
DMG (macOS)
This option is recommended for macOS users and comes with a bundled JRE 17.
To install Message Manager, follow these steps:
- Download the latest version of Message Manager DMG from the official website.
- Open the DMG and follow the on-screen instructions.
- Once the installation is complete, you can launch Message Manager by double-clicking on the icon in the start menu.
- The runtime configuration and updated JARs will be downloaded to: "~/Library/Application Support/conapi/Message Manager"
Installer (Windows)
This option is recommended for Windows users and comes with a bundled JRE 17.
To install Message Manager, follow these steps:
- Download the latest version of Message Manager MSI from the official website.
- Run the installer and follow the on-screen instructions.
- Once the installation is complete, you can launch Message Manager by double-clicking on the icon in the start menu.
Generic Installation (Windows, Linux, macOS)
Before you start, make sure you have Java 17 installed on your system.
To install Message Manager, follow these steps:
- Download the latest version of Message Manager zip/tar.gz from the official website.
- Extract the downloaded file to a folder of your choice.
- If you have Java 17 on the PATH then simply navigate to the bin folder and run the launch script (launch.cmd on Windows, launch.sh on Linux/MacOS)
- If you do not have Java 17 on the PATH, you can either install add the Java Runtime 17 to your PATH or customize the environment script.
There is also a Launcher-Only version available. This download only contains the launcher and will download all required dependencies on first start. (Except for the Java Runtime 17, which has to be installed separately)
Custom Environment Script
In the bin folder of the installation package, there is a file named "setenv.sh.template" (Linux/acOS) and "setenv.cmd.template" (Windows) in this folder.
For macOS you find this file in "~/Library/Application Support/conapi/Message Manager/bin"
Rename the file for your operating system by removing the ".template" extension. Then open the file (setenv.sh or setenv.cmd) in a text editor.
Windows Example:
rem OPTIONAL - if you want to override the default JVM options
rem set JVM_OPTS=-Djavax.net.ssl.trustStore=NUL -Djavax.net.ssl.trustStoreType=Windows-ROOT -Djava.net.useSystemProxies=true -Djavafx.embed.singleThread=true -Dswing.systemlaf=com.sun.java.swing.plaf.windows.WindowsLookAndFeel -DSolace_JMS_Browser_Timeout_In_MS=1000

rem Use LAUNCHER_JAVA to specify the Java executable to use
set LAUNCHER_JAVA=%JAVA_HOME%\bin\java.exe
Linux/macOS Example:
#!/bin/bash

# OPTIONAL - if you want to override the default JVM options
# export JVM_OPTS="-Djava.net.useSystemProxies=true -Djavafx.embed.singleThread=true -DSolace_JMS_Browser_Timeout_In_MS=1000"

# Use LAUNCHER_JAVA to specify the Java executable to use
export LAUNCHER_JAVA=$JAVA_HOME/bin/java
Ensure that the LAUNCHER_JAVA variable is set to the correct path of the Java executable (Java 17) on your system. Optionally and for advanced users, you can also customize the JVM options by setting the JVM_OPTS variable.
The launch script will run this before launching the application.
Automatic Update
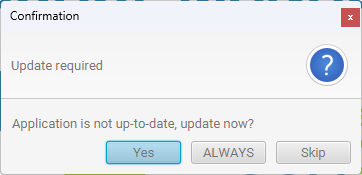
On each start, Message Manager will check if a newer version is available. If a newer version is available, it will download the new version and replace the old one. We recommend to use the "Always" option to ensure that you always have the latest version without any further prompts.

To get the prompt again you can set autoupdate=false in the launcher.properties file. The file is located in the installation folder.